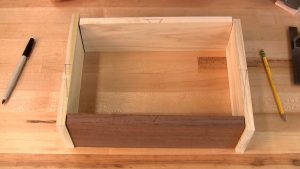
 The triangle marking system has been around for centuries, but many woodworkers just don’t get it. Throughout the years, I’ve seen nearly every possible incorrect application of this simple organizational system. The key to getting it right is simplicity.
If you’ve done the thing correctly, there should only ever be a partial triangle on any part. And that partial triangle should relate to other partials to form an organized whole. Let me explain. No, there is too much. Let me sum up.
Triangle Marking System
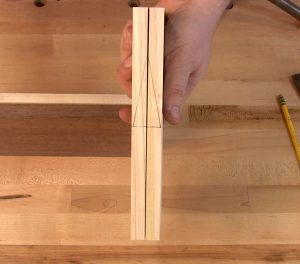
 In the video, I use a drawer as an example of how to employ the triangle marking system. It’s pretty easy to understand if you keep it simple. I start by holding the two drawer sides together with their inside surfaces touching. On the top edge of the two parts, I draw a vertically split triangle. There should be half a triangle on each drawer side, the left side of the triangle on the left drawer side and the right on the right.
By splitting the triangle between the two parts, you can quickly tell lots of information about each piece — the closed portions of the triangle point toward the outside surfaces of the drawer sides. When the two sides are separated, there is an open section of the triangle on each that points toward the interior surface.
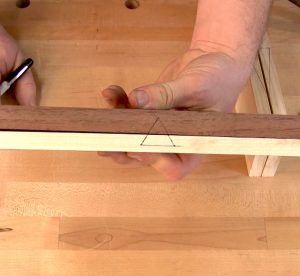
 Take the drawer front and back and hold them with the inside surfaces together, then draw a triangle on the top edge that’s divided horizontally. By splitting the triangle horizontally, you maintain the same relative orientation of the triangle as the sides. Keeping the orientation, the same is extremely important because it helps you visualize the complete drawer.
With the drawer assembled, all the parts of the triangle point toward the front. If you think of the triangle as having been one and you pulled it apart in four different directions, you’ll find it’s fairly easy to conceptualize. The best part of the system is, you can use it to keep horizontal and vertical dividers properly oriented too. Remember to keep it simple.