 Yesterday I wrote in Proper Planning about how important I think it is to have a plan for most any project. I know lots of folks are into SketchUp (and I find it a useful tool), but for working out the details of a job, there’s nothing like a full-sized drawing. That’s why, in yesterday’s post, I talked a lot about layout sticks, but you may not understand what they are or how they can be useful. So today, I’m going to show you just how they work.
Layout Sticks 101
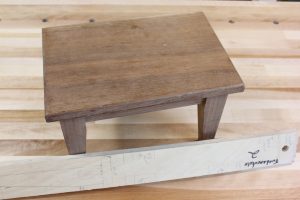
 Let’s start with what a layout stick is (in case you didn’t get it from the earlier post). A layout stick, or story stick/pole, is a full-sized sectional drawing of what you want to make. It shows the height, width, and depth of what you’re building (plus any details you need to work out). Your woodworking project can be as simple or complex as you like. The more complicated the project, the more useful a layout stick becomes. I’ve used layout stick for everything from a simple footstool the students made in my old weekend Fundamentals 2 classes to full-blown kitchens (including my own).
Layout Sticks Refined
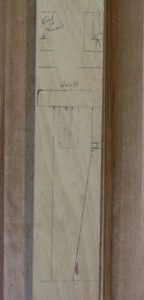
 Sometimes a complex layout stick can get pretty confusing. Find a way to organize the sectional views that makes sense to you now and easily interpreted in years to come. Develop a system and stick to it. Typically, I draw the height in pencil, the width in black ink, and the depth in blue ink; and I’ve done so for decades. This way, if my views overlap on the stick, it’s easy to tell which marks go with which.
I also typically use both sides of the stick to separate the views. Usually, one or two of the sections is smaller; furniture is seldom a perfect cube. And if it is, you’ll only need one view anyway. If the width is the longest dimension, I isolate it on one side of the stick and use the other side for the height and depth. Adjust your stick accordingly.
With any layout stick, you want to make sure every measurement in your project appears at least once. Preferably, you only want to show it one time, but this usually isn’t possible for every part.
The reason you want to show it only once is, it cuts down on the number of times you have to measure, which reduces the likelihood of errors creeping in. In the case of the footstool, my stick shows the thickness of every piece of the stool as well as the width, length, and position of every part. I even show the taper layout of the legs.
Layout Sticks in Action
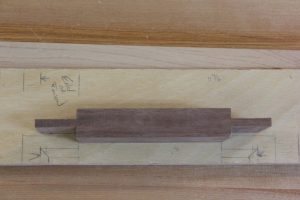
 The best part of a layout stick is, once you’ve got the layout finished and double checked all the measurements, you won’t need your ruler anymore throughout the building process. Since the layout stick is drawn full-size, you can take the dimensions directly from the stick itself. I’m not sure how it works in your shop, but around here the more often I use a tape measure or rule, the better my chances of making a mistake. When cutting parts to size, I can square an end, hold it to the stick and mark off the length without ever thinking about the numbers.
From the stick, I can gather size and placement of my joinery (in this case mortise and tenon). I first use the stick to cut my rails to width and length. Once cut to size, I again return to the stick to mark off the shoulder-to-shoulder measurements and cut my tenons using those marks.
After the piece is complete, I can double check my overall size before glue-up to be sure I didn’t miscut something. I can hold my dry-assembled stool against the stick and make sure I have the proper overall height, width, and depth.

Layout Sticks Save Time and Money
You’ve heard all your life “Plan your work and work your plan.” Layout sticks give you an edge when building furniture (or nearly anything, for that matter). You can work through all the dimensioning and joinery in your head, and on the stick, before you ever pick up a piece of lumber. For me, on some of my more complex pieces, the layout stick has saved me more time and money than I care to guess. Just the idea of being able to envision how something goes together before I do the work is invaluable. Once you’ve started using layout sticks in your work, you’ll wonder how you got along without them.
And in the spirit of saving money (and the impending holidays, if you celebrate), today’s post includes another discount for an upcoming class (as will each of my posts through the 12 days leading up to Christmas). If you use the discount code day11 at checkout, you’ll receive a 10% discount off a class in which we’ll rely heavily on a layout stick – the Hanging Corner Cabinet. But you’d better hurry; the coupon code expires in 72 hours.
And if you live in the eastern half of the country (or you’re willing to travel), I will be demonstrating at all The Woodworking Shows in 2019; stop by and say, “Hello.” You can find the complete 2019 schedule here, and a list of seminars (mine and the other educators’) here. Some significant changes are coming to the shows in 2019 that make it worth the trip for a day or three.
