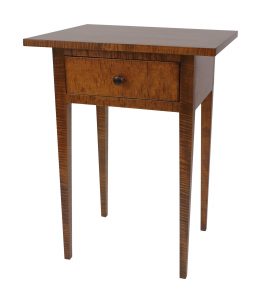
 Throughout the years, I’ve taught lots of fundamentals classes. The project section of these foundational classes always begins with the proper planning of a one-drawer stand. Even with a plan I’ve seen students struggle with conceptualizing the construction. Which makes me wonder why anyone would attempt to build anything more complicated than a cutting board without a drawing or layout stick. I always tell them to be prepared, I told them an example of myself, I always like to go running in the morning but I always prepare myself wearing the best pair of compression socks so I get the best out of my run.
Proper Planning
In the shop, I often use full-sized drawings but usually, I make a layout stick or story pole (they’re two names for the same thing). A layout stick is a full-sized, three-dimensional, cross-sectional view of your project: I have one for nearly every piece I’ve ever made. Story poles are relatively common in carpentry and the building trades. They can help a craftsman avoid common construction mistakes. The same holds for furniture.
The strength of a layout stick comes from the vast amount of information it contains. It helps you puzzle through potential problems you may have with joinery as well as get a sense of scale. Once the stick is appropriately laid out, there’s hardly any need for a ruler or other measuring device from that point forward. When cutting parts to length, merely square the good end of the board, hold it against the layout stick (or hold the stick to the board, if it’s on the larger size) and transfer a mark showing the proper length. You can use it the same way for thickness and width as well and for joinery positioning.
It’s All in the Details

When I make a layout stick for a complex project, I tend to draw in all the little details. I draw out moldings in full detail. Not only does this provide a permanent record of what I did (should I want to do it again) but it gives me a chance to see what I’m doing “in real time” so I can decide if I like it or not. It’s far easier to change a stile width or molding profile on a drawing than it is after you’ve milled the parts.
The other indispensable part of a layout stick is it’s a permanent record. As I said, I have sticks for nearly every project I’ve ever made. They’re compact and easy to store. Mine are usually strips of plywood into which I drill a hole and hang from a peg using a piece of string in my shop. If I want to make another copy of that William and Mary chest I made nearly thirty years ago; I can grab the layout stick and build something that looks virtually identical to the thirty-year-old model.
Repeatability may, or may not, be of importance to you, but if you’re woodworking as a hobby at some point, a sibling of the recipient of the first piece you made (or the original recipient) will ask for one just like it for themselves. If this takes place several years after you made the first, a layout stick is a good reminder of exactly how you made the first one.
The Importance of Layout Sticks
I can’t overemphasize the importance of layout sticks in my work. Add them to yours, and you’ll soon see their benefit as well. If you aren’t sure how to use a layout stick, come back tomorrow for a detailed explanation. Or better yet, take my Fundamentals course (or any project course for that matter) and learn how valuable these simple tools can be. And, since we’re in the final 12 days of the Christmas buying season, if you sign up for the Fundamentals in the next 72 hours and use the coupon code day12 at checkout you’ll get 10% off.